
Preparing your Toyota Hilux for Maintenance
When it comes to maintaining your Toyota Hilux, there are a few steps you should take before starting any work. Preparing the vehicle ensures that you can complete any repairs or maintenance safely and efficiently. Here’s what you need to do:
- A) Park the Toyota Hilux in a secure location and ensure that it is in the park and the emergency brake is engaged. This will help keep the vehicle from shifting during maintenance or repair work, which could lead to injury or damage.
- B) Lift up the front wheels of the Toyota Hilux using a jack and securely support them with axle stands. This will give you more space to access parts of the vehicle as needed while also keeping it stable throughout your maintenance routine.
- C) Remove both wheels of the front axle using a socket wrench to unscrew all lug nuts holding them in place. Doing this will give you better access to brakes, rotors, callipers and other important components so that they can be inspected or replaced as needed. Make sure to store all removed parts securely, labelling each one for future reference if necessary.
By following these steps when preparing your Toyota Hilux brake pad replacement.
Disassemble Brake System:
- Unbolt the calliper from its mounting bracket using an appropriate size spanner or Allen key, depending on your car model’s brake system design, then lift off the calliper from the rotor disc and set it aside without disconnecting any brake lines or hoses to avoid potential leakage later on during reassembly process;
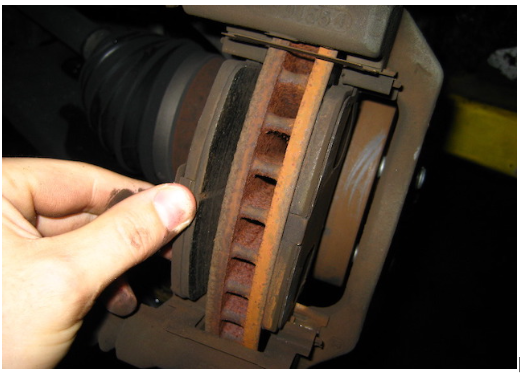
- Remove worn-out brake pads from calliper mounts; c. Take off any remaining dust shields or clips that may be attached to either side of the rotor disc.
If you have a car, it is important that you know how to safely and effectively disassemble the brake system. This article will discuss the steps necessary for properly disassembling your car’s brake system.
The first step in the process is to unbolt the calliper from its mounting bracket. This is done using an appropriate size spanner or Allen key, depending on your car model’s brake system design. Once unbolted, lift off the calliper from the rotor disc and set it aside without disconnecting any brake lines or hoses. Doing this will avoid potential leakage during reassembly later on.
The second step involves removing worn-out brake pads from calliper mounts. This can be done by unscrewing them with a suitable tool such as pliers or an adjustable wrench for the proper removal of old pads.
Finally, take off any remaining dust shields or clips that may be attached to either side of the rotor disc. These are often small plastic pieces that protect both sides of the rotor disc from debris buildup and should be removed prior to the replacement of new pads and callipers for proper installation during the reassembly process later on down the line.
Install New Brake Pads: a. Grease up the back surface of new pads with a small amount of high-temperature grease provided by the manufacturer; b Place new pads into calliper mount slots with their friction surfaces facing the rotor disc.
Maintaining the brakes on your car is one of the most important things you can do to ensure your safety on the road. One of the most common brake repairs is replacing worn-out brake pads with new ones. Installing new brake pads correctly requires a few simple steps that, if followed, will ensure proper installation and performance.
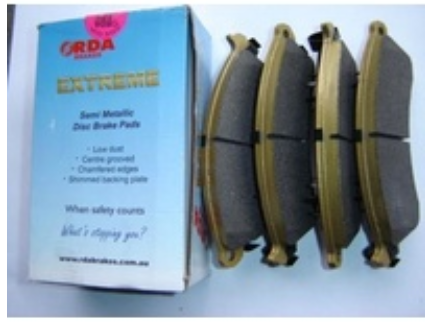
The first step in installing new brake pads is to grease up their back surface with a small amount of high-temperature grease provided by the manufacturer. This will help protect against corrosion and also provide some lubrication for when they are installed into their calliper mount slots.
The next step is to place the new pads into their respective calliper mount slots, making sure that their friction surfaces are facing towards the rotor disc. Once both pads are in place, secure them with a clip or spring washer as per manufacturer recommendations before moving on to installing any anti-rattle clips if necessary. Finally, check for sufficient clearance between all components before tightening up all bolts and screws on each pad assembly to finalize the installation.
It’s important not to skimp on any steps during pad installation since this could lead to premature wear or even complete failure of your brakes during braking manoeuvres which could be potentially dangerous!